- Introduction of Model Trains for Beginners
- Understanding Scale and Gauge
- Model Railroad Planning for Beginners
- Model Trains for Beginners – Drafting a Track Plan
- Model Trains for Beginners – Building Benchwork
- Model Trains for Beginners – Laying Trackwork
- Electrical Power with Analog or DCC?
- How to Easily Build Realistic Scenery
- Choosing Your Scenery
- Model Railroad Structures
- Buying Model Trains, Locomotives and Engines
- Model Trains for Beginners Conclusion
Introduction of Model Trains for Beginners
The purpose of writing the model trains for beginners guide is to help save you the frustration from making costly building mistakes plus help you save time and money during the construction process.
This tutorial will address the basic building blocks of constructing a model railroad from start to finish. We’ll discuss everything from choosing a track plan, building a bench, wiring, scenery and even how to find cheap deals on locomotives and engines for your railroad.
This guide virtually guarantees that with some action on your part, you’ll build the model train layout of your dreams. Model trains are the best hobby in the world – it should be simple and fun. But most beginners tend to complicate things and the frustration soon sets in.
Think of why you want to build your dream layout? Is it for something that you and your children, or grandchildren, can enjoy together as a family, maybe it is to satisfy your inner creativity, build your own little world or to help you relax. There are hundreds of reasons why different people build their dream layouts.
Building a model train layout is a great “family friendly” hobby as everyone can get involved and everyone can participate. My main reason for entering the model train hobby was to get my children away from the television and video games and it has worked very well.
Not only have they moved away from the television but model trains have been very educational for them. They’ve learned some railroading history, basic carpentry, electrical and artistic skills, planning and designing with some engineering and problem solving.
But usually beginners make the common mistake of buying, or being given a starter set and then trying to grow this set into their dream layout… This usually ends up becoming an unwieldy mess of a layout.
Learn How to Build a Model Train Layout of Your Dreams with Limited Space, Time and Budget..!
You Can Make It Happen Within The Budget, Timeline, And Space YOU Have Available
With some initial planning you will completely avoid this problem. It doesn’t take a huge budget, or the need to be a technical person. There’s no need to be an artist, or an electrician. You don’t need to be a certain age or gender.
You just need to realize that model trains as a journey not a destination. The fun and enjoyment is in the building of your layout and constantly improving it.
Some people may find it a bit strange that adults are playing with toy trains. That’s because they don’t understand what skill is actually required to build and operate a model train layout. When they do understand, they soon realize what a great educational and fun filled process it is.
This section is an overview to help establish the basic concepts of model railroading. In this section, we will cover important topics that should be considered when first planning your model train layout.
It’s a massively rewarding and fun hobby that is only limited by your imagination… so let’s get started…
Understanding Scale and Gauge
Before choosing the scale and gauge of your model train layout, first try to understand the difference between the two words. Scale is the proportion of the model relative to the real-world size and gauge is the distance between the rails.
When looking at scale size, you’ll notice that scale is expressed as a ratio or as a fraction, with the numerator or top number always being 1, and the denominator or bottom number being how much bigger it is in the real world.
For example, Z scale is 1:220 or 1/220th, which means that you’ll need 220 of the little models to make a full life size version. It’s one of the smallest scales available. If you are intimidated by small parts or have trouble seeing or handling things, then Z is most likely not the best fit for you.
N scale is 1/160th scale and one of the most popular scales. Japan is famous for building model railroads in N scale. Like Z scale, an advantage of N scale is that it allows model railroaders to build layouts that take up less space than larger scales and have more detail.
HO scale is by far the most popular scale in the world and contains many supplies and accessories. Its scale is 1/87th, being half that of O scale. HO scale is great to use for your first layout, and you can easily build an oval track to run trains on. It also tends to have the most diverse set of accessories, including locomotives, scenery and structures.
Size O is 1/48th scale, the most common scale within the United States until the early 1960’s. Its popularity declined after World War 2 with the introduction of smaller scales. O scale is also a popular scale for aircraft modeling. There is still a good number of used locomotives that can be purchased in this scale, and it’s easier for kids to play with plus more robust so it doesn’t break as easily.
There are two different kinds of O scale. One is the 3 rail O, which means the third rail is in the middle of the track, which is why it’s called On30.
There are also 2 rails; however, you cannot mix the two, as the electricity for each is wired differently.
S scale is 1/64th and not as popular, but people like to use it, given it has the same advantages as O scale, such as being robust without feeling big or clunky.
Most G scale models are built to a similar size and are mostly used in garden railroads, outside and exposed to environmental conditions. G scale does not stand for garden scale but is commonly referred to as that.
For most model railroaders, HO and N scale are the best bang for your buck. The prices are lower because many people love it, which means there is no shortage of accessories for the scales. It really comes down to a matter of personal preference or it depends on the individuals using the model train layout.
| Scale Size | Proportion to Real Size | Minimum Radius |
| O scale | 1:48 | 24 inches |
| S scale | 1:64 | 22.5 inches |
| OO scale | 1:76 | 21 inches |
| HO scale | 1:87 | 15 inches |
| N scale | 1:160 | 7.5 inches |
| Z scale | 1:220 | 5.75 inches |
You have seen the terms “scale” and “gauge” used interchangeably. Sometimes, even retailers and manufacturers tend to confuse them. Scale and gauge are not even close to being the same thing. You can have three model trains with different lengths and heights that all use the same gauge.
You can have the same scale but different gauges for different cars. For example, narrow gauge and standard gauge are the same scale, but use a different gauge.
Narrow gauge is depicted by the small letter ‘n’ with numbers after the main scale letters. Some scales that use ‘n’ are HOn3 and On3.
A narrow-gauge railroad has the rails closer together and is typically used in mountainous areas and forests, where there are geographical constraints to having a wider train track. Imagine the quicksilver mines that run throughout mountainous regions, a tight small gauge railroad makes the most sense there.
Model Railroad Planning for Beginners
Let’s take a deep dive into planning your initial model train layout plan. One of the biggest mistakes model train beginners make is going too big, too fast. Model trains for beginners will need to spend a considerable amount of time on the planning phase.
Starting off with too large of a layout can be overwhelming and make you lose interest quickly. Instead, start off with a small layout, such as a 4 x 8 feet layout, which can eventually be moved to a larger, permanent solution. Most mega-layouts initially started off as small 4×8 layouts and were further built upon.
There are a few different options to draft our model railroad plan. The two options are using a computer design program or simple pen and paper. The computer software programs usually provide a drag and drop interface and lets you view a 3D model of the layout. If you’re using pen and paper, try to start off with a rough sketch and use actual measurements in a scaled down version to ensure precision.
Where to Build a Model Railroad?
Finding space for your model train layout can be an issue but finding innovative ways to deal with it can be exciting and fun. Here are a few different ideas:
- Shelf layouts
- Coffee table layouts
- Door layouts
In terms of areas, basements have long been a favorite spot for model railroads. Something to consider before building in your basement is the humidity, water problems, utilities and accessibility.
Another great location is the attic, but keep in mind that hot air rises, and in warmer climates the temperature fluctuations can be destructive to your layout, especially the paint on your scenery. Garages and spare bedrooms are other great locations, but humidity needs to be kept in mind.
A few other key elements to consider when planning include reach-ability and comfort. You should be able to reach any part of your layout without having to stretch or get uncomfortable.
Also, the layout should sit at a height and position that is suitable for you and any helpers, such as children. You may also want to raise it up so it’s not accessible to pets that can potentially ruin all your hard work.
Model Trains for Beginners – Drafting a Track Plan
The next step is to draft a track plan of the layout. It’s important to draft a track plan before building benchwork because the benchwork must be able to fit your track plan.
The basic building blocks of your track plan will consist of either a continuous running loop or a point to point track plan.
Continuous running track plans can be stretched out in different ways to make your track plan unique but will always create a loop for your model railroad. Some examples of loop to loop layouts are simple oval, figure eight and twice around.
Many people find the continuous loops to be more soothing and relaxing to watch than a layout that has trains end up in a shed after they complete their route.
A point to point layout is exactly what the name states, your trains go from point to the other. For example, a prototype style model railroad that starts your trains in a terminal station and ends with them back in the shed.
If you’re planning on drafting your own track plan, computer-aided design models or sketches are the best way to go. Also, use Google Earth to see your favorite railroads from an aerial view. This is especially useful if you plan on prototyping a track plan.
Given that most model railroaders start out by building their track plan on a 4’x 8’ plywood, track plans that are 4’x 8’ friendly are abundant and you can gather many great ideas for that size layout.
Learn How to Build a Model Train Layout of Your Dreams with Limited Space, Time and Budget
You Can Make It Happen Within The Budget, Timeline, And Space YOU Have Available
Model Trains for Beginners – Building Benchwork
Before choosing which bench to create, you’ll have to determine how much weight the bench will carry, as this will dictate the strength of construction.
There are several options for building benchwork—it can be a bookshelf, a kitchen table, or anything in between. The main objective is to have a flat surface that can hold the weight and is large enough to build and grow your layout upon.
Some other points to keep in mind include the height of the bench. It might make sense to keep it low enough that you can sit in a chair to operate your trains but high enough so that kids can stand, suiting both audiences. Other times, hobbyists might want to run the trains at chest level, so that kids can’t reach them, depending on who you want your audience to be.
You will also want to make sure that every area is accessible and within arm’s reach in the layout. A big mistake some model railroaders make is building the layout too wide and not being able to access the middle parts of the layout.
It’s important to have the track plan in mind before building benchwork because once you start to lay track it will become very evident if the curves fit on the surface of your bench. If they don’t fit precisely then your trains will not move correctly, and it is a sure-fire way for constant derailments and an overall unpleasant experience. Remember that lacking bench space will not allow you to alter anything.
Keep in mind that your general benchwork plan should fit loosely within the size of your bench that you’re building and allow for minor alterations as you progress or change your mind.
You don’t have to keep a plan in mind ahead of time if you don’t want to be hampered down by a rigid plan. Another way to go about building benchwork that won’t cause any problems is to choose the size of your benchwork and then build a general plan that will fit into it afterward.
It’s quite difficult to imagine all the mountains, rivers, gradients from a simple theme and track plan drawing. That’s why some people opt-in for building a plan after the benchwork is completed.
The best way to understand the construction of benchwork is to view the actual process instead of just reading about. The video below will provide an exact tutorial for constructing your benchwork along with supplies needed and a step by step process.
Model Trains for Beginners – Laying Trackwork
A question that always comes up first is, “What type of model train track should I use?” Fortunately, there are several different brands and sizes available. Mostly, what you use is personal preference.
One thing to remember is that the size of the rails is reported as the code. For example, code 83 model railroad track has larger rails than code 55 track. The smaller rails are often used for branch lines, whereas the larger codes are for mainlines. This is often the way they appear in the prototype that is reality, so you can simulate that on your layout if you wish.
A caveat to this is that you must make sure that, when you make the transition between different codes on the same layout, the rails are lined up properly to prevent any derailments. You may have to use small pieces of wood underneath the railroad ties on the adjoining end of the code 55 track so that the rails of the code 55 track will line up properly with those of the code 83 track.
Another point to remember is that sometimes branch lines may not have much roadbed, if any, under the track, while mainlines almost always do.
Model railroad track is sold one of two ways. The first is sectional track, which is small sections of either straight track or curved track that come in 2-3 different standard radii. This type of track does not come with roadbed.
This means that you’ll have to make the roadbed yourself. One issue when building your own roadbeds is that the ballast within the roadbed can get caught up in the wheels of your locomotives.
The other is flex track, a very flexible 3-foot piece of track that can be curved to whatever radius you want. Sectional track, but not flex track, can also be purchased with roadbed attached.
Another type of track is called all-in-one track. It’s basically regular sectional track, but it comes with the roadbed included – that’s the rock ballast used to make the roadbed. Joiners are the connections between two separate pieces of track. You get the best results from track by using the same manufacturer.
Gradients
A good rule of thumb is a 3% climb or 3 inches up for every 100 inches along. This provides a natural looking climb that most locomotives with a reasonable train can handle.
Lay switches, also known as turnouts, first, then curves, and then finish it off with the straights. Also, take your time, and test the track as you go with a few reliable cars.
Roadbeds
In model trains, roadbeds are used for a variety of reasons. Some of these reasons include ensuring the track is on a level surface so the trains can move smoothly. It is also used to reduce the noise of the train as it moves.
For example, without a roadbed, the track would be rail, and ties would be sitting on your bench, which can cause an unpleasant rumbling sound.
Also, roadbed is important, because it makes the model railroad look like the real thing.
There are a few different types of roadbed available, such as wood, foam and vinyl, but the most popular type is cork roadbed.
When installing track on the roadbed, be careful not to track down too hard, as this will cause the roadbed to become uneven. Putting tacks in every 2nd hole is enough to hold the track in place.
Check your track for level by looking along the length of track. Any dips or bumps can be leveled out by using some card stock.
Electrical Power with Analog or DCC?
It’s probably a good time to get more technical… I’ve given you an overview of control systems, but I think you need more information to make the right decision on which control system you should use.
What we are talking about will completely transform your model trains and provide as much fun as you can ever have with this great hobby!
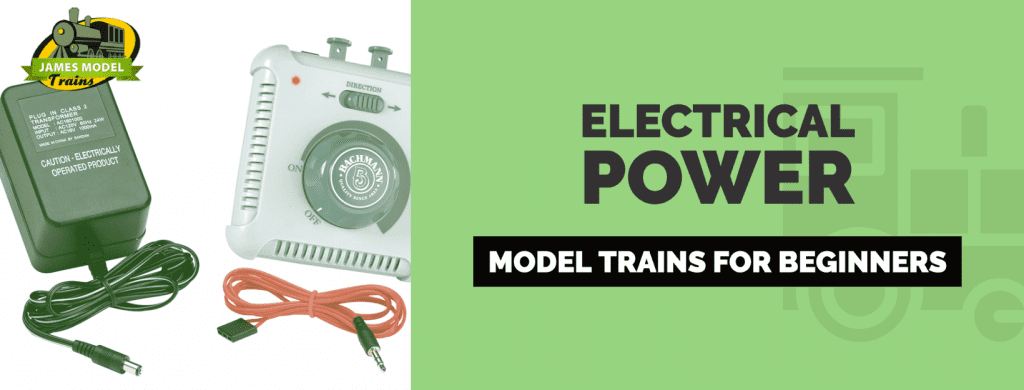
Analog Control Systems
An analog control system is usually the standard control system you receive when you buy a model train set. It consists of a power pack which takes the power from your power outlet and reduces it down to a safe voltage.
When this voltage is applied to the track you can adjust this voltage or reverse the polarity simply by moving the dial on the power pack. If the voltage is increased the train will speed up, while a decrease in the voltage will slow it down. By changing the polarity of the voltage the train will reverse.
Digital Command Control (DCC)
Digital Command Control is commonly known as DCC. It allows locomotives on the same electrical section of track to be independently controlled using computer technology.
Your model train layout becomes a computer network. Your locomotives are like the different computers on the network. Each locomotive is fitted with a decoder which responds to the data transmitted down the track from a small processor which is your command station.
Each locomotive decoder has a specific address and only responds when instructions are sent for that address. This allows multiple trains to be run on the same electrical section of track.
Some DCC enthusiasts will talk about complex programming, digital data packets, alternating current waves and other confusing DCC information but the truth is you do not need to know any of this.
DCC is as simple as taking it out the box, plugging it in and playing with it.
As you get familiar with it you may want to explore the more complex programming.
A common misconception about DCC is that it is only suitable for large complex layouts. The truth is it is a far better way of controlling even the smallest layout as it completely removes any operating constraints.
How to Easily Build Realistic Scenery
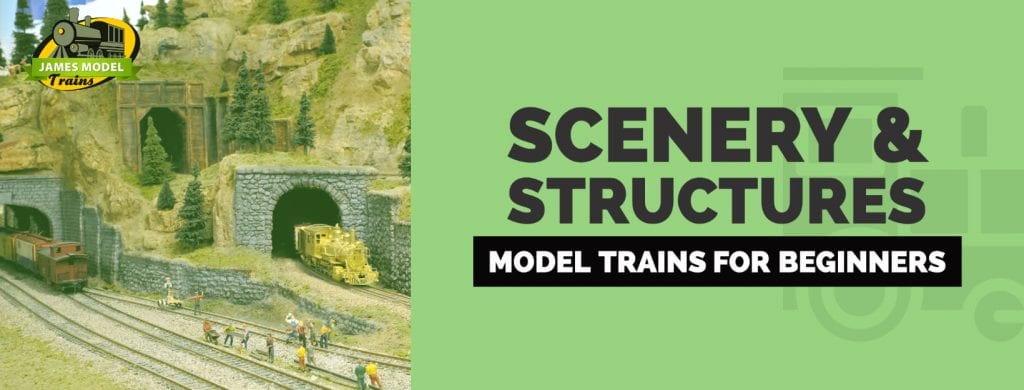
Now is when we get to the creative side of model trains. Creating realistic scenery is the part that pulls your layout together and brings it alive. You’ve started with a train set, and now it’s time to convert it to a full scale model railroad.
Choosing Your Scenery
Scenery is the geographical setting of your layout. It’s the countryside and cityscape that your railroad will eventually run through. It can be as simple or as elaborate as you want.
Hobby shops online and offline sell a huge selection of scenery products to make the job easy. These range from imitation groundcover and grass to rock molds, trees and shrubs to scenic backdrops.
In the planning stage of your layout you would have thought about the era of your railroad and the location geographically. You may need to research this era by surfing the internet or visiting the library. Pay attention to the architecture of the buildings as this detail will add more realism.
Find out what shrubs and trees are found in that geographical location. That way you can buy or make the correct trees and shrubs.
Consider the season you are modeling in. Depending on your geographical location you may need flowers in spring and summer, colorful leaves in fall and even snow in winter.
Trains have a purpose for being there. Real freight trains transport freight between industries, towns and cities. Passenger trains transport passengers between towns and cities. Think of your layout. Where will the station, tunnel or bridge be situated?
Have you considered the crossings and having operational signals? Blinking lights and operational features on your layout add more life and the children love them.
Working water towers, coal loaders, control towers, elevators and conveyors add a completely different dimension to model railroading. To build and operate a fully working scene, which gives the railroad a real purpose, is much more interesting and rewarding.
You will find yourself taking more notice of the world around you. Have a close look at real life crossings and look for how the road joins with the crossing. Notice how the ballast is dirtier in the center of the rails compared to the outside and the vegetation that grows close to the railroads. Notice how signage on buildings is placed and replicate all these findings on your model train layout.
A great trick to create depth to your model railroad is with the use of mirrors. A road or track that butts up to a cleverly disguised mirror in your backdrop will give the illusion of the road and track continuing. A mirror behind a town, shunting yard or station can make it look it twice as big.
Tools for Scenery
A static grass applicator is needed if you want to use static grass, which stands up and looks very realistic.
A spray bottle is good for wetting scenery before you glue it together. Usually, with most scenery, you must wet it before using an eyedropper or similar tool to apply glue. Because it’s already wet, the glue will spread through it, and when it dries it will all be fixed in place, rather than being loose.
If using foam to build scenery, using a hot wire or bladed cutting tool can make the job less messier than using a serrated knife or other mechanical tool. Be sure to use a respirator or work outside, since the fumes can be toxic.
Learn How to Build a Model Train Layout of Your Dreams with Limited Space, Time and Budget
You Can Make It Happen Within The Budget, Timeline, And Space YOU Have Available
Model Railroad Structures
If you have been very diligent and organized in your layout planning, you will already know exactly what structures you will be putting on your layout and where.
You will also know the exact scale sizes of your buildings and whether they will fit in the available spaces. If so, then you can go ahead and lay the track. Do the terrain first and add your buildings in as time permits.
However, some of us aren’t quite that organized. You may just have a general idea that you want to put a town here and an industry there, etc. In this case, you may find that after the track is laid, you don’t have enough room for the model railroad building you wanted to use. That’s okay, though, because you can always kitbash the building to make it fit or even build it from scratch.
Another option is to create many of the model railroad buildings first, before the track is permanently installed. It’s a good method because you can get an idea of how your structure will fit into the whole scheme of things in 3D, and whether you will need to modify your track plan (e.g., add a branch line or runaround track) to better accommodate or service the structure.
When thinking about what model railroad structures you want to have on your layout, make sure to use buildings that go along with the theme, era and locale that you have chosen for your railroad. It wouldn’t make sense to have a lot of inappropriate buildings placed haphazardly on your layout just to fill in empty spaces.
Model Railroad Building Kits
This is the primary method used to create buildings for my layout. Most of them are not very expensive, are easy to build in 1 or 2 evenings, and can be easily modified before you put them together if you wish. Also, they usually look better than ready-made structures. If you don’t like the color of the structure pieces as they come out of the box, you can airbrush the parts first and then put them together.
This is much easier than trying to paint structures after they have already been built. Most of these kits are made with styrene, which is easy to work with, and doesn’t require much skill. You just must closely follow the directions that come with the kit. Laser kits are made with thin sheets of precut wood that might require a little more skill and time to do them well, but probably look a little better and appear more realistic on the layout.
Some kits require a fairly high level of expertise. It’s not suggested that you start your model railroad building career with one of these, but they are fun to do and are very rewarding and realistic if you feel inclined to progress to the level of a model craftsman.
Kitbashing To Create Unique Model Railroad Buildings
This method of creating model railroad buildings involves taking one or more commercially sold kits and modifying them in such a way as to develop a completely new or unique structure. This may be as simple as cutting walls to make a smaller building that will better fit into a space on your layout.
Using this method you can make a corner building fit into a city block or between two tracks that form an acute angle that no ready-made building or kit will fit into. It’s a good idea to use two kits (either two of the same kit or two different kits altogether) and put them together in a way that forms a new building – perhaps a larger or taller structure than either of the originals.
Another idea is to attach a smaller building to a larger one to make it appear as if an addition was added to the original structure years after the first structure was built.
Placing Your Model Railroad Buildings
When you place your structures on your layout, you should make sure that you incorporate the structures into the surrounding scenery. Your building should not look like it was just plopped down on the layout.
It should appear well-grounded, with no gaping spaces between the ground and the bottom of the building. The trees, grass, weeds and bushes surrounding the building should be placed realistically.
Buying Model Trains, Locomotives and Engines
Choosing locomotives is another exciting part of building your model train layout. It’s always fun discovering locomotives with all the bells and whistles that fit your theme. It’s very worth it to buy good locomotives; even if the other cars are junky, locomotives are the most important – quality over quantity.
It’s important to understand how electricity is picked up from the tracks to your locomotive before going out and purchasing your first locomotive. Locomotives metal wheels pick up electricity from the track, which feeds into the motor that turns the gears for the locomotive to move. It can be very frustrating if your locomotive needs a push to start going or suddenly stops.
Locomotives with bad connections to the track, or a poor motor-to-gear pick up, will be very troublesome. A great operating locomotive makes up a large part of enjoying your model railroad. Like with most things that are of quality, as stated earlier, you get what you pay for.
When buying a locomotive these points are critical:
- The amount of metal wheels that pick up the electricity – the more the better, but definitely more than 1 set.
- A good gearing ratio and motor which requires the least amount of electricity to move the locomotive, with a slow but smooth start.
- Flywheels at one or both ends of the motor to ensure a smooth take off and smooth stop.
- The weight of the locomotive should be just right to maintain a good connection to the track at all times but not too heavy to make the locomotive sluggish.
- The length of the locomotive – shorter diesel locomotives are less likely to derail on the curves than longer steam locomotives.
Most hobby shops will let you test the locomotive on their in-house test tracks before you buy. Test the locomotive forwards and backwards… Check for a nice smooth take off and a nice smooth stop when the power is ramped up or down.
I usually go into my local hobby shop after doing my research online, that way I know what other model railroaders have said about the particular model. I also check the prices online, as then I can negotiate. That tip has saved me nearly 30% of the retail price in some cases.
But remember your local hobby shop has overheads and needs to make some money! So, don’t negotiate too hard. Buy quality when you buy your locomotives. I guarantee the investment will be well worth it.
Model Trains for Beginners Conclusion
There is only so much we can put in this ultimate guide for model train beginners before we completely overwhelm you with information. We have provided what we believe to be the most important information.
But, like most things in life, you only really learn when you physically start implementing what you have learned. Visiting model train shows and talking to other railroaders will also help you with further ideas.
Model railroading is the greatest hobby in the world and I wish you many, many years of fun with your model trains.
Learn How to Build a Model Train Layout of Your Dreams with Limited Space, Time and Budget
You Can Make It Happen Within The Budget, Timeline, And Space YOU Have Available