You’ve built the benchwork, laid the trackwork, did all the wiring and connected your DCC to your locomotives so they can move at any rate of speed or in any direction and now one of the final steps is left, building model railroad scenery.
The first step to remember is the theme and era you’ve chosen for your model train layout. Also, keep in mind the type of model railway, is it a prototype or a scratch built model railroad? This will determine whether you’ve got a choice in choosing the type of scenery such as with a scratch-build. If it’s a prototype replica, the build doesn’t not allow for too much creativity but still requires elaborate details to maintain the super realistic look of the real thing.
The use of “forced perspective” is one of the greatest model train scenery techniques utilized. For example, using larger trees in the foreground and progressively adding smaller and smaller trees the further away the layout is from the tracks, gives the illusion that a great distance is separating the track from the mountains and trees in the background.
Another useful tip is to add smaller sized buildings the further back from the tracks. This process creates the “forced perspective” of layout scenery.
First off, let’s start by gathering a comprehensive understanding of the basic requirements needed to start building model train scenery.
Tools for Building Model Railroad Scenery
A static grass applicator is needed if you want to use static grass, which stands up and looks very realistic. A spray bottle is good for wetting scenery before you glue it together. Usually, with most scenery, you must wet it before using an eyedropper or similar tool to apply glue. Because it’s already wet, the glue will spread through it, and when it dries it will all be fixed in place, rather than being loose.
If using foam to build scenery, using a hot wire or bladed cutting tool can make the job less messy than using a serrated knife or other mechanical tools. Be sure to use a respirator or work outside, since the fumes can be toxic.
Accessories for Layout Scenery
To gather the right accessories for your layout scenery, visit your local hobby shop and start researching the brands for the fundamental aspects of scenery, such as imitation groundcover, grass to rock molds, trees and shrubs, scenic backdrops and terrain.
Don’t fret if you can’t afford it; many model scenery projects can be completed with materials that you already have laying around the house or that you can find in your backyard.
Building Rocks in your Model Railroad Scenery
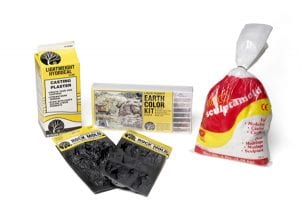
Building rocks for your model railroad have a huge variety to choose such as casting plaster rocks using rubber molds and painting them. After the Plaster of Paris is cast into molds and setup by hardening into the desired shape of the rock, the next step is to paint the rocks using acrylic paint.
The types of painting techniques that are helpful when building model railroad scenery are washes and dry brushing. Washes are to flood an area with a thin solution of paint, using a large brush. Once the base color dries, apply a very thin wash of a dark color that will settle into the books and crannies thus simulating natural shadows that you see on rock formations.
For dry brushing, you drip the comb into the paint and wipe it nearly dry by using a towel so only a tiny bit of paint remains. After doing this, you then drag it gently over the raised surfaces to give it the look.
How to Use Space for Model Train Scenery
There is not one right way to build but there are only two ways it can go and that is either vertical or horizontal. If you don’t have a ton of space to build out hills and tunnels horizontally due to limited space, you can always go upward. The main things that matter is creativity and structure placement when building vertically.
HO Model Railroad Scenery
HO Model Railroad Scenery is the most popular scale of scenery and carries the largest variety of different types of scenery items. Some of the most famous backdrops look the best when using HO train scenery. If you are a true artist, creating unique backdrop paintings can really separate your layout from anyone else’s and add a unique flavor. When putting HO model railroad scenery together, remember to not take it too seriously but try out many different types of buildings, trees, and shrubs.
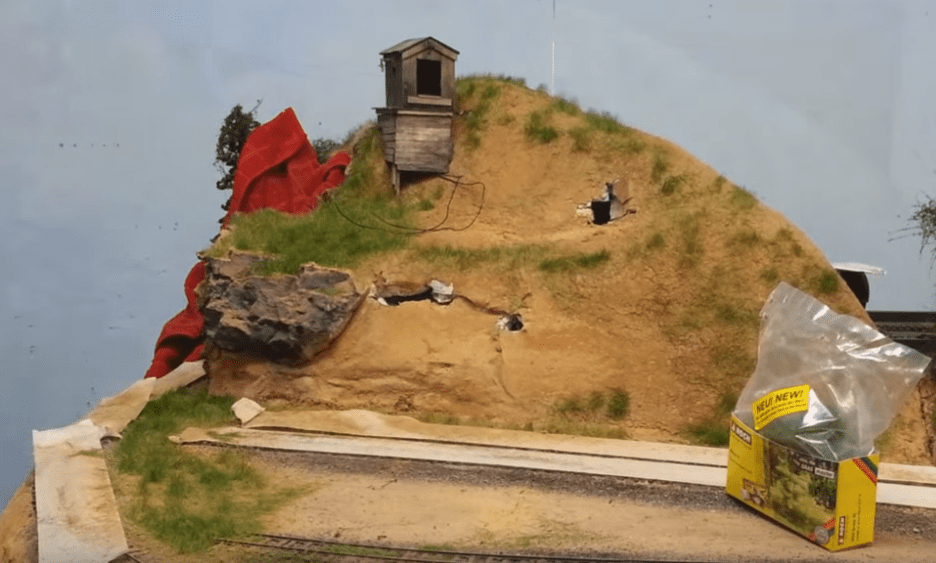
Building a grassy knoll for ho train scenery is by far one of the simplest and inexpensive ways to add scenery to your HO model train layout. You can simply take some old newspapers and crumble them up into the shape of a basic hill. From there flatten the top part out and glue it down. Finish it off by adding ground cover and foliage.
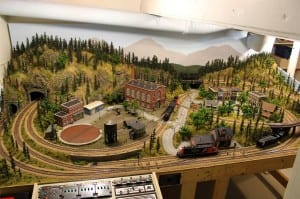
4×8 HO Scale Foambed Photo Gallery of Railroad Scenery
Here’s a list of even more HO scale model train scenery ideas spark inspiration.
HO Scale Lumber Model Railroad Scenery
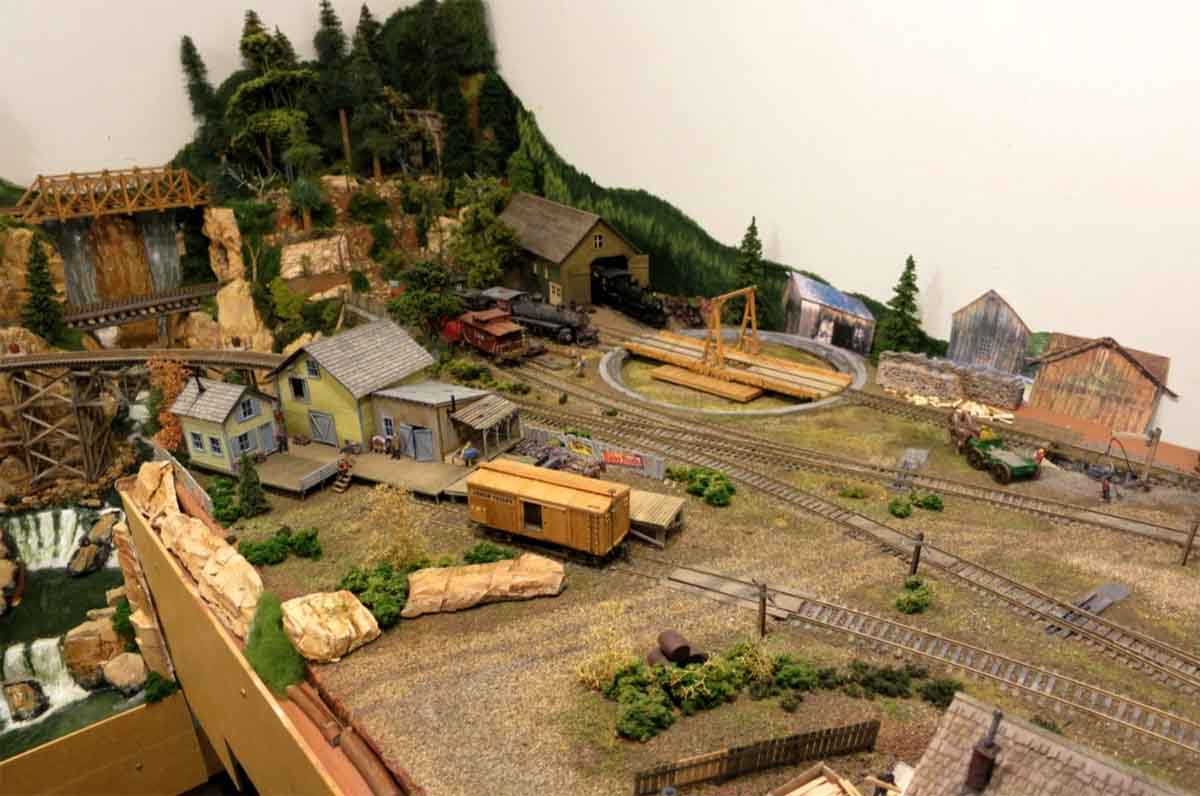
The HO scale layout has a lumber mill theme. Tracks wind through a forested mountain area. It includes a functional turntable and a trestle bridge over a rocky chasm. There are various industrial buildings, like a sawmill and storage sheds. These buildings show realistic aging. The scenery features a waterfall and river, adding dynamic water. This compact layout realistically represents a lumber operation. It’s ideal for an industrial touch in model train scenery.
HO Scale Model Train Layout Design Ideas
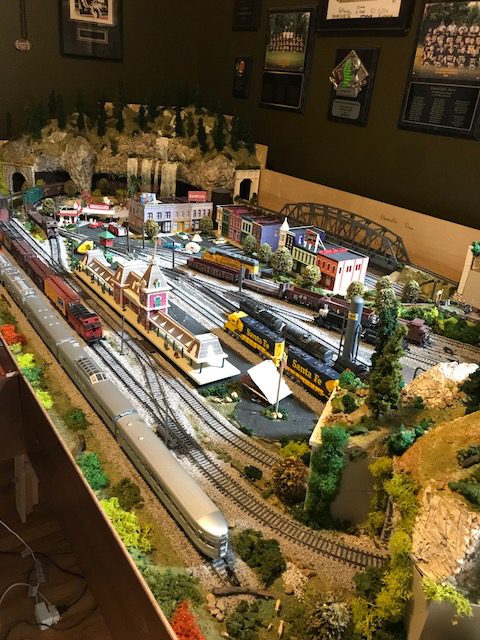
This HO scale model train layout features a mainline loop with a passing siding for multi-train operation. The track includes bridges and a tunnel, providing both aesthetic and functional variety. The detailed town scenery, complete with buildings and figures, is complemented by natural elements like a river and textured landscape. It’s a practical yet picturesque layout suitable for any model train hobbyist looking to enrich their setup.
HO Scale Desert Scenery
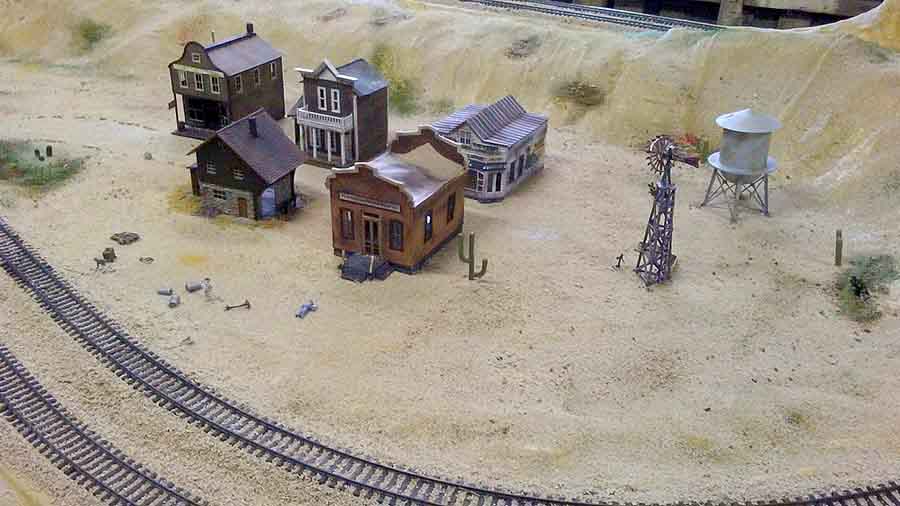
This HO Scale desert model train layout features a straightforward loop track design, allowing the emphasis to be on the detailed desert town scenery. Weathered buildings, including a saloon and homes, stand on a sandy base, with sparse desert vegetation like cacti adding authenticity. The layout includes subtle hills, contributing to a realistic desert topography. This scenery is an accurate scale representation with an attention to detail.
Adding model railroad scenery is an important part of building a model train layout. Adding realistic scenery can transform a basic layout into a thing of beauty.
Mountain Model Railroad Scenery
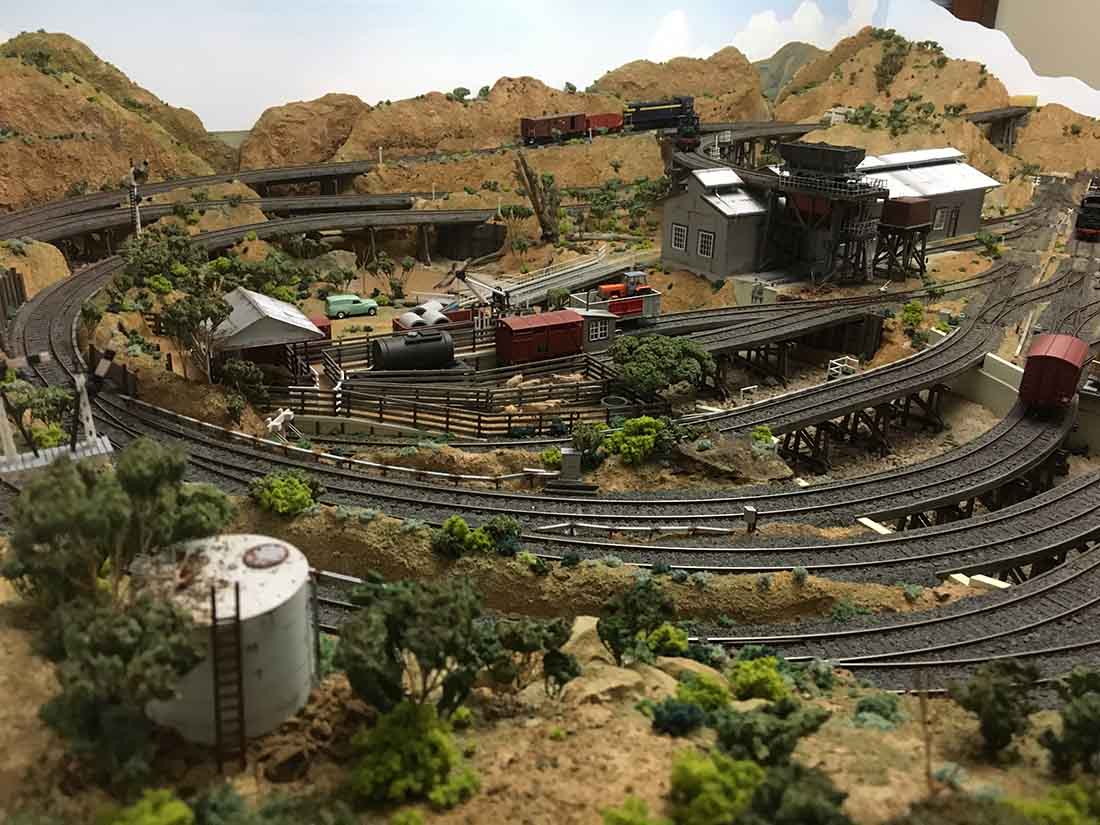
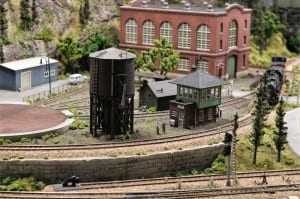
This model train layout features a multi-level track plan that navigates a mountainous terrain with elevation changes. Tracks are strategically placed to include curves and straights, enhancing operational interest. The mountains are textured and hand-painted, while the realistic greenery and structures like a coal mine and water tower add to the scene’s authenticity. It’s an ideal mountain railroad model for enthusiasts, offering a blend of complex track work and detailed scenery elements for a compelling display.
Model Railroad Water Scenery
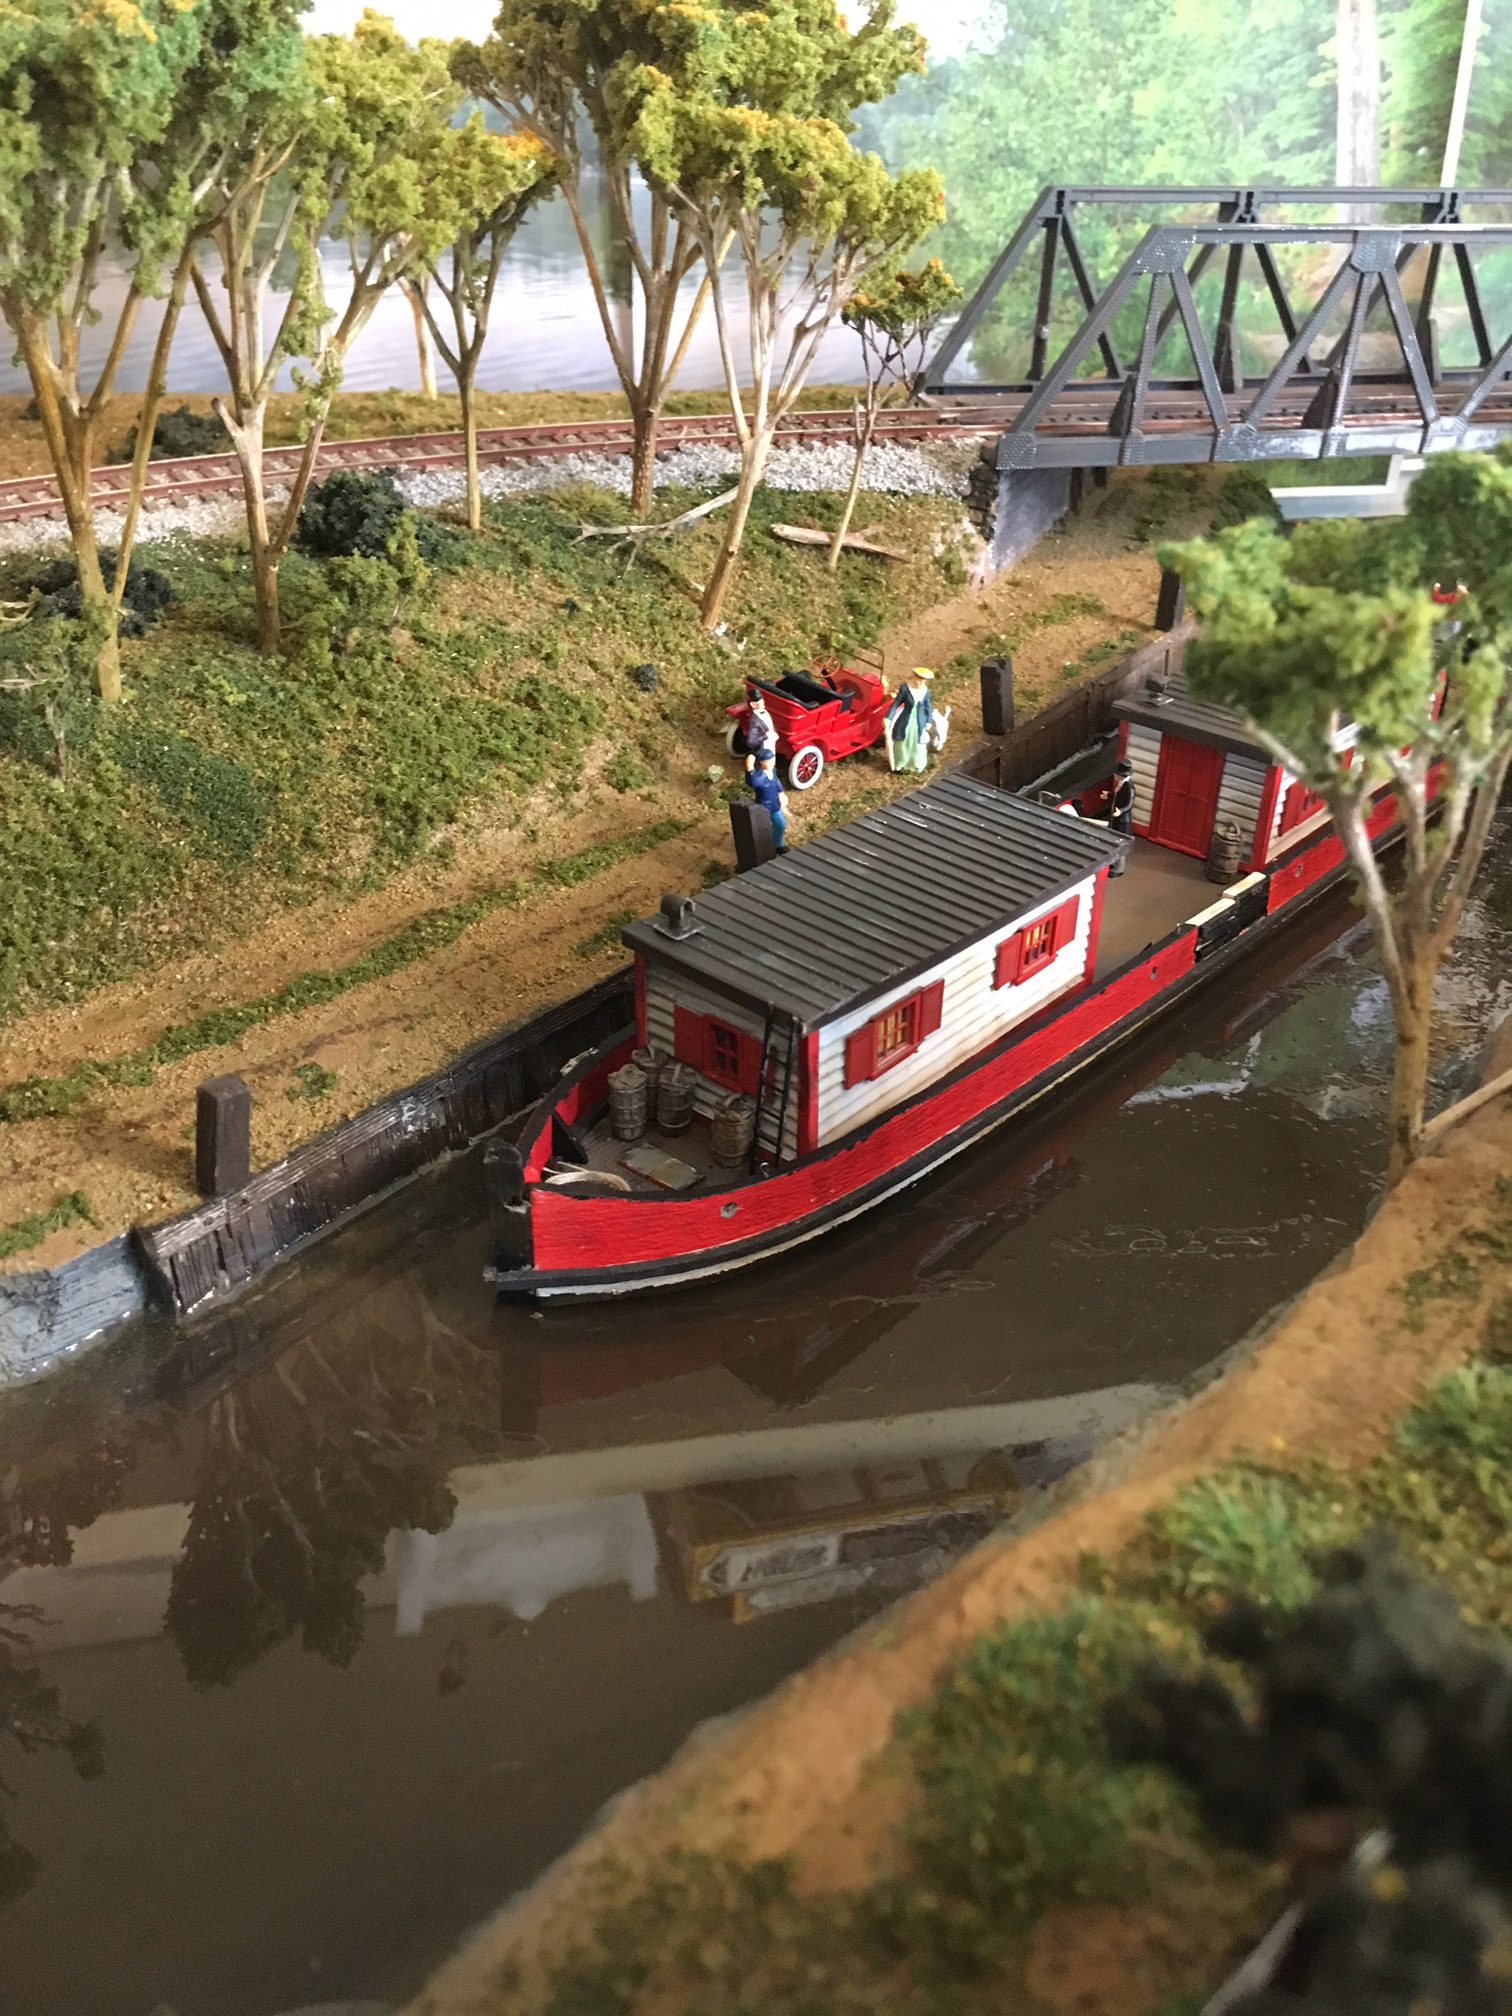
This model train layout features a houseboat moored on a realistic waterway, with a backdrop of densely forested areas and a steel truss bridge. The track layout is simple yet effective, curving gently around the scene. The water element, central to this setup, adds depth and reflects the surrounding details. This compact water-themed layout is an excellent example for enthusiasts seeking to add water features to their model railroads for enhanced visual interest.
N Scale Model Railroad Scenery
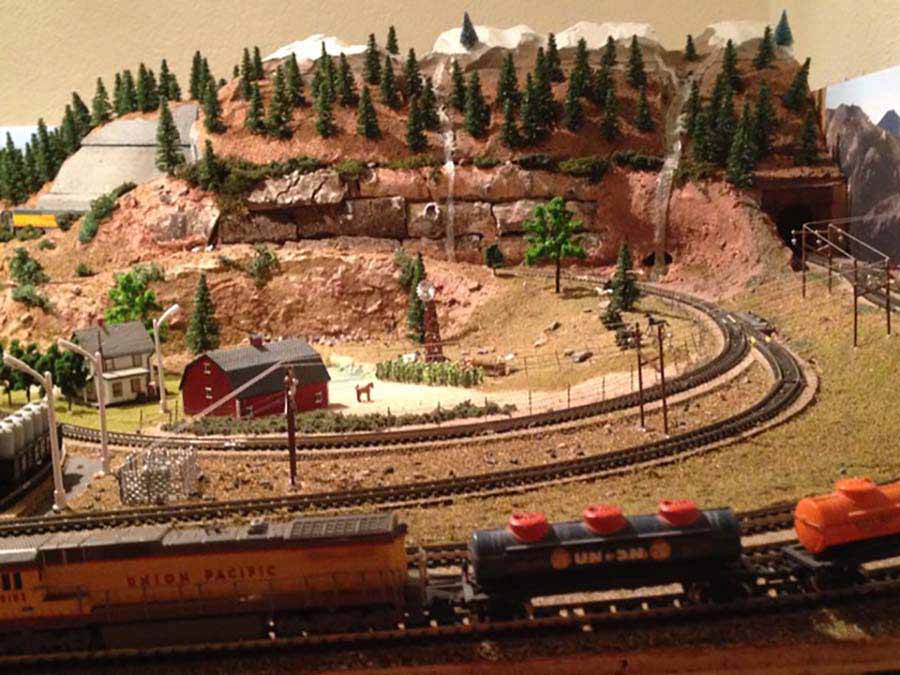
This N scale model train layout features a mountainous backdrop with a track winding through tunnels and around curves. Detailed scenery includes a barn, farmhouse, and trees, set in a rural theme. Its efficient design is ideal if you’re with limited space, providing a realistic and functional miniature railway experience.
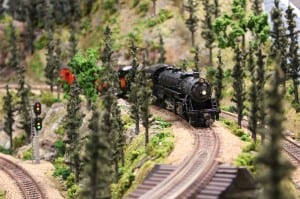
N Scale Mountains Scenery
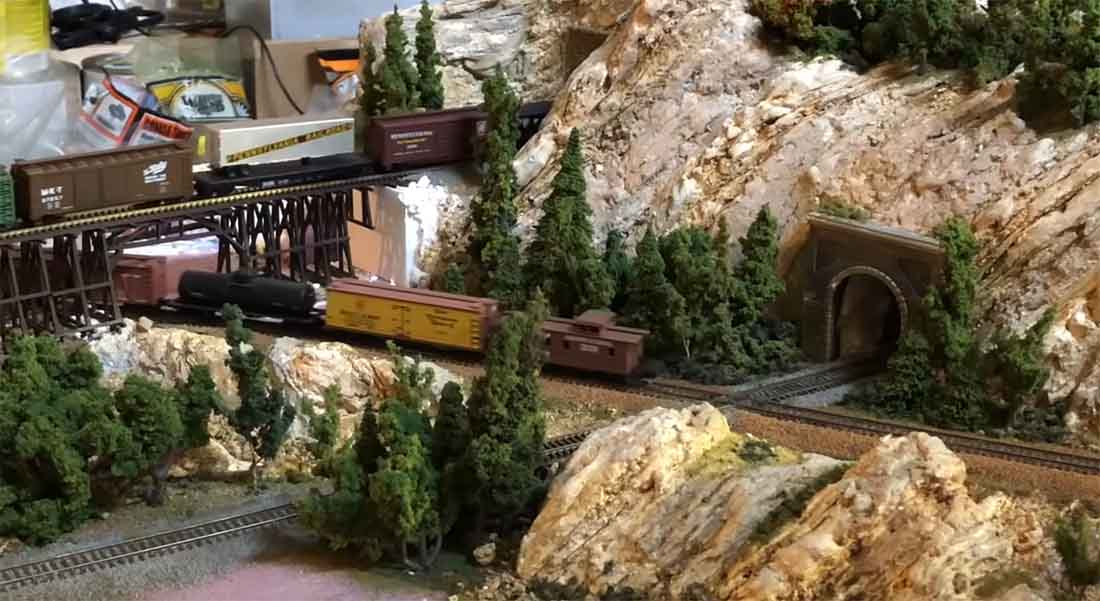
This N Scale model features a multi-tiered track layout cutting through a mountainous terrain, with rocky textures and a realistic color palette. Dense evergreen trees and a detailed bridge enhance the rugged landscape. A tunnel portal is a functional element that also adds depth. This compact, mountain-themed layout is ideal if you’re seeking to add a natural and challenging environment to your model railroad.
O Scale Model Railroad Scenery Layout Ideas
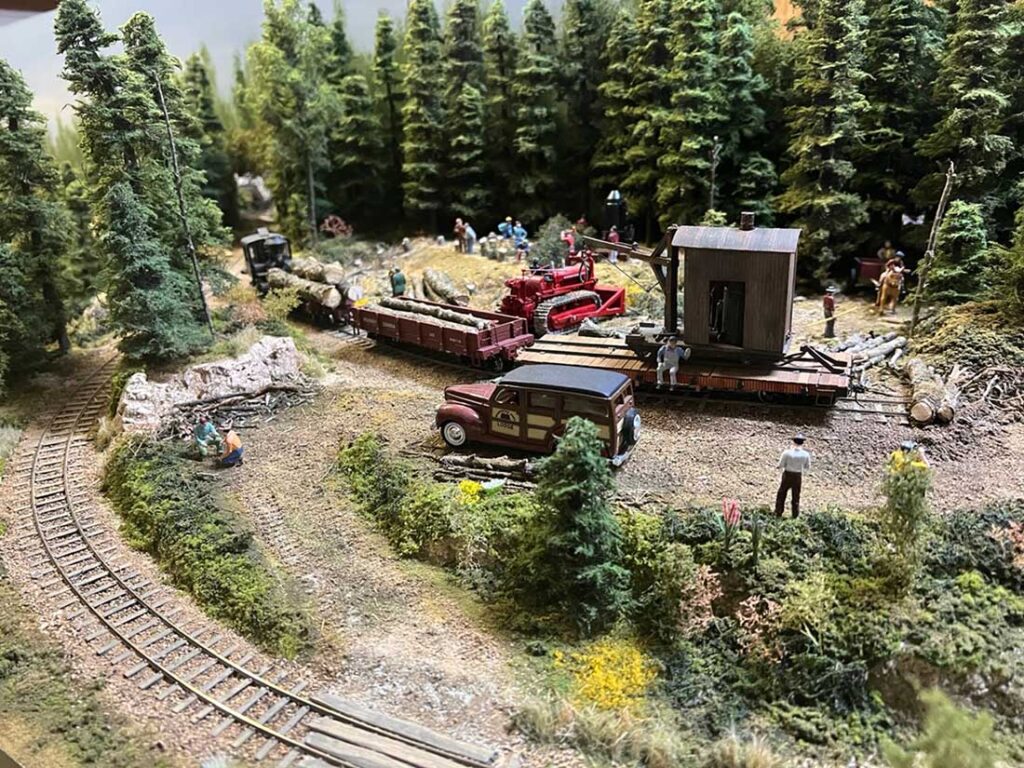
This O scale model layout showcases a logging industry scene with a track winding through a dense forest setting. The layout includes a loading area with a shed, detailed figures, and period vehicles, adding authenticity. Ground cover and trees are used effectively for a realistic appearance. This practical and visually appealing setup is ideal for O gauge modelers interested in creating a historical railroad scene.
Model Railroad Town in Valley Scenery

This model train layout features a dual-track mainline in a loop configuration with additional sidings for operational variety. The tracks navigate through a realistic landscape, including a small town with houses, a church, and commercial buildings, as well as industrial elements like a water tower and oil tanks. This compact yet detailed setup is an excellent choice for model railroaders looking to maximize space without sacrificing visual appeal and operational enjoyment of conducting the trains.
Z Scale Model Train Layout
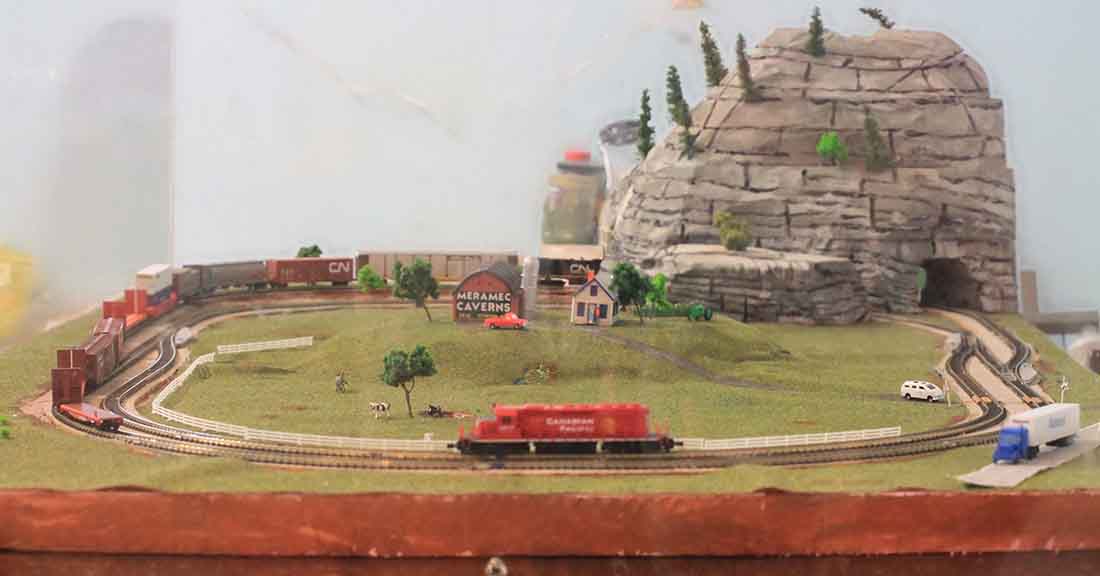
This Z scale model train layout maximizes a small space with a circular track and a central hill featuring a tunnel for visual interest. Scenery includes trees, a farm, and the “Meramec Caverns” building, with a branch track leading to a station. Details like signals and vehicles add realism. It’s an efficient layout that demonstrates the potential of Z scale modeling.
Model Railroad Background Scenery
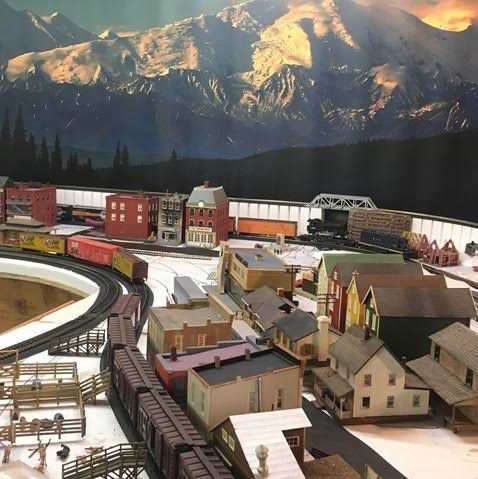
This model train layout features a tiered track design that navigates a small town with realistic buildings, including brick commercial structures and cozy homes. A mountainous backdrop adds visual interest and depth. Greenery is sparing but effective, with scattered pine trees. The overall design, with its attention to detail and scenic background, makes it a solid choice for a model railroad backdrop.
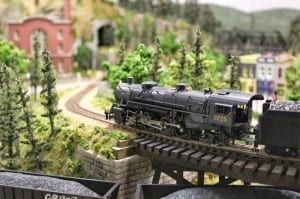
Bridge Design Model Railroad Scenery
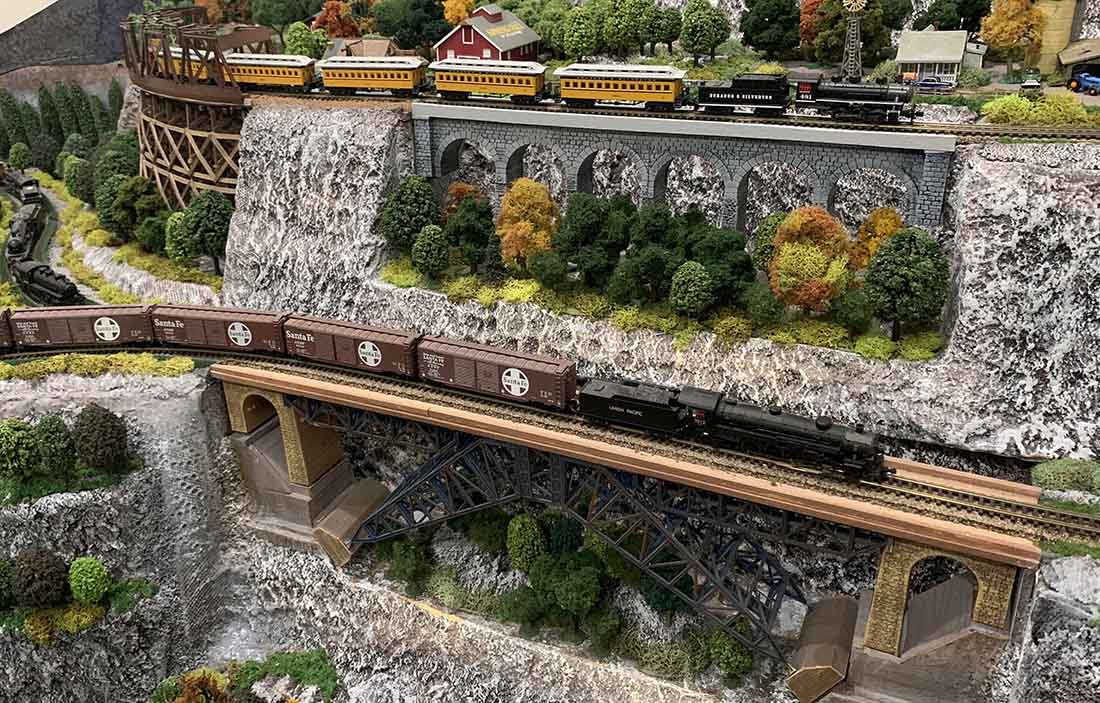
The model train layout features a multi-level bridge with a stone arch on the lower level and a metal truss bridge above, each carrying period-specific freight trains. The N scale tracks are set against a backdrop of realistic rocky terrain interspersed with varied trees and shrubs, suggesting seasonal changes. Buildings in the distance add context, indicating the bridge’s role in connecting communities. This layout, focusing on the bridge as a centerpiece, is an ideal addition for model railroad enthusiasts aiming to enhance their setups with elements of natural and industrial scenery.
Model Railroad Waterfall Scenery
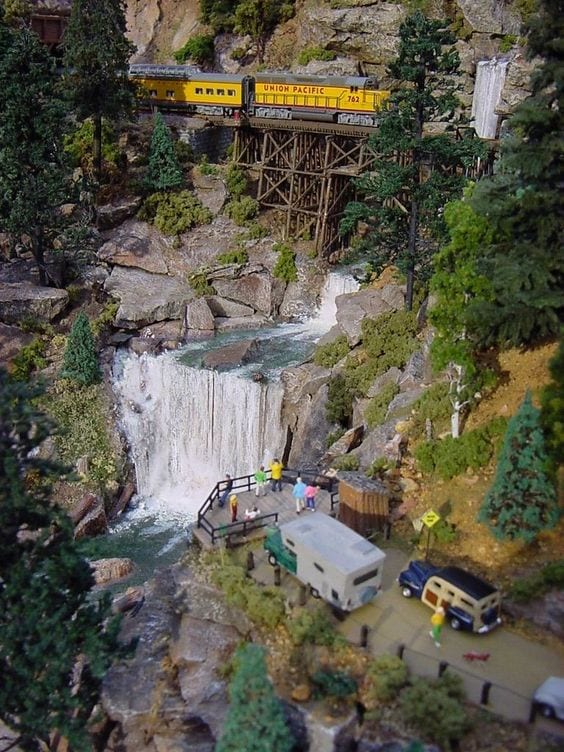
The layout features a model train crossing a wooden trestle bridge over a waterfall. Realistic trees and terrain details surround the water feature, creating depth. The waterfall flows into a pool, with rockwork and plants enhancing the natural look. Figures and vehicles near the waterfall suggest a park scene. This compact, scenic layout effectively combines engineering and nature, ideal for a model railroad enthusiast’s collection.
River Scenery Ideas for Model Railroads
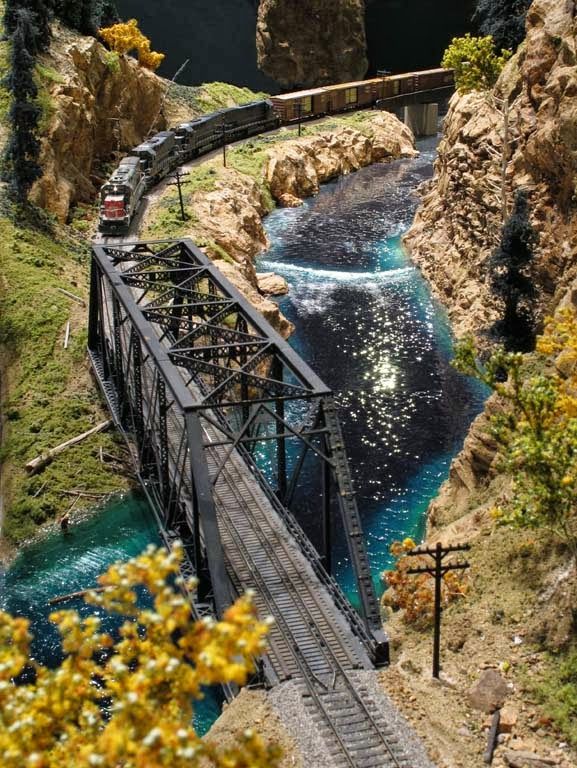
This model train layout features a realistic river with a truss bridge for the train to cross, set in a rugged, rocky terrain. The track is laid on a textured bed, designed to look durable and authentic. Surrounding scenery includes cliffs and trees in autumn colors, adding depth and a natural feel. The river and bridge are the focal points, making this an ideal example of how to incorporate water features into a model railroad for enhanced visual interest.
Winter Wonderland Model Railroad Scenery
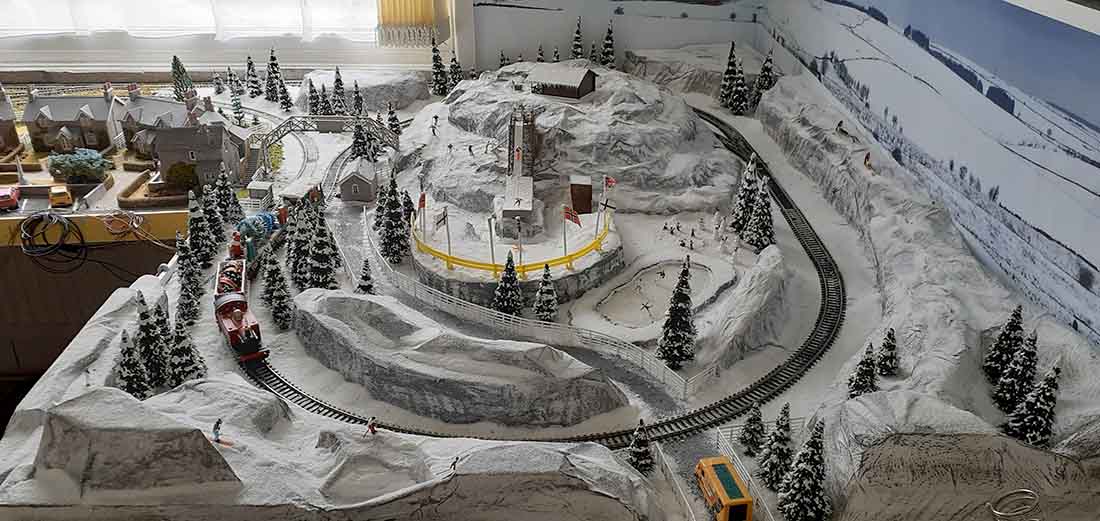
This winter model train layout features a mountainous snowy terrain with looped and curved tracks, allowing trains to navigate an elevated landscape. Snow-covered pine trees and a detailed snowy village with a central frozen pond create a realistic winter scene. The layout uses layered materials to shape the terrain, with a hand-painted backdrop enhancing the seasonal atmosphere. It’s a well-crafted example of how to create an immersive winter model railroad scenery.
Christmas Model Railroad Scenery
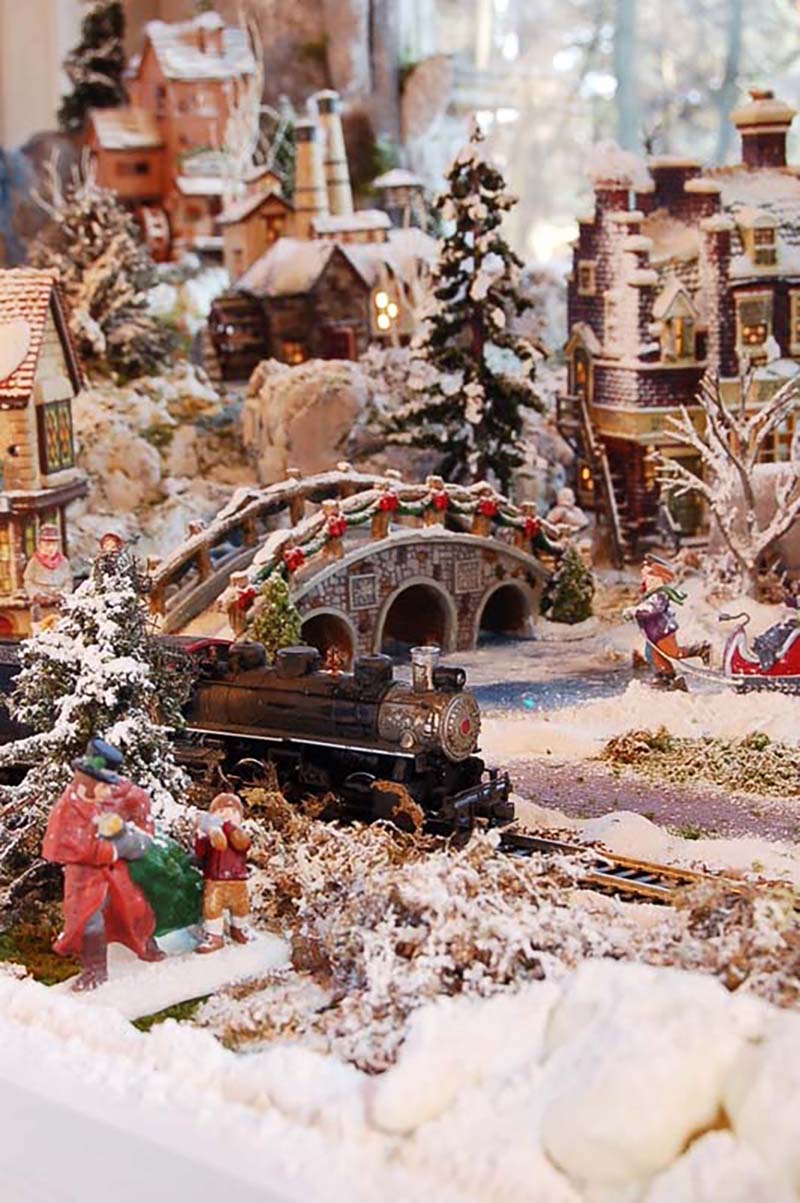
This Christmas-themed model train layout features a steam locomotive crossing a stone bridge, set in a snowy village with illuminated buildings and seasonal decorations. Tracks wind through the scene, passing by figures engaging in holiday activities. The landscape includes snow-dusted trees and a frozen lake, creating a realistic winter setting. This compact and festive layout is ideal for model railroad enthusiasts seeking to capture the holiday spirit in their scenery.
Model Railroad Buildings Enhancing Realism
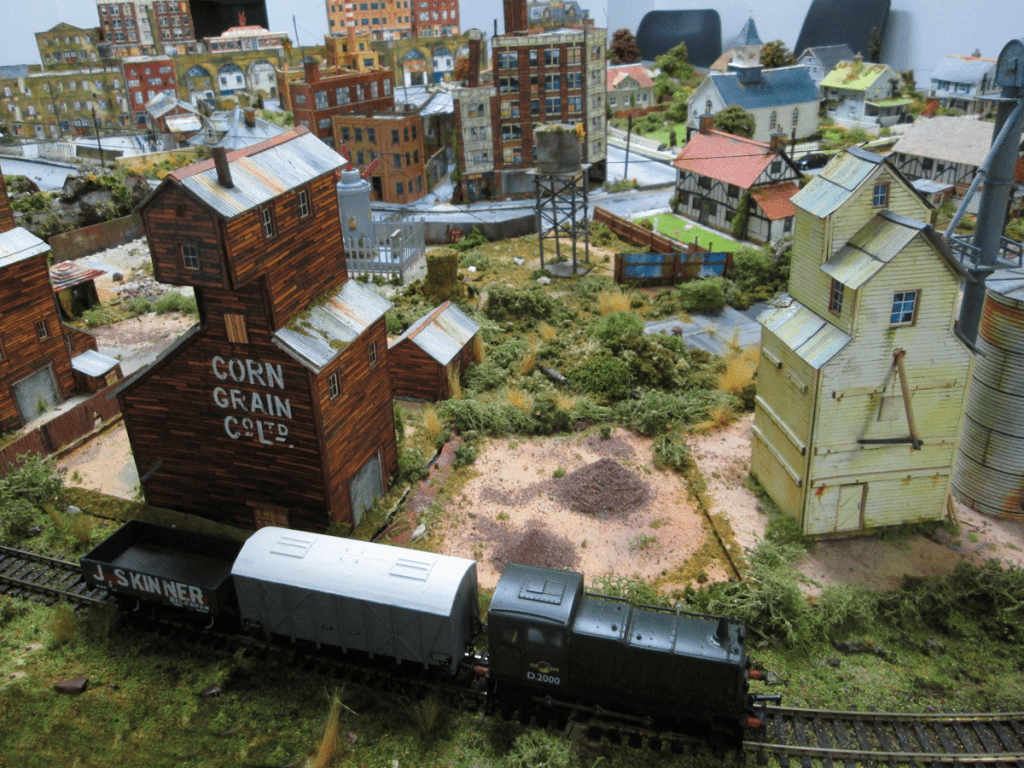
This model train layout presents a compact industrial scene with an oval track circling between weathered buildings like the Corn Grain Company building. Textured scenery with overgrown patches and varied building sizes creates depth. The design balances industrial and residential elements, suggesting a lived-in, working community. It’s a good design idea for model railroad scenery due to its attention to detail and realistic portrayal of a rail-centric town.
O Scale City Model Railroad Scenery Ideas
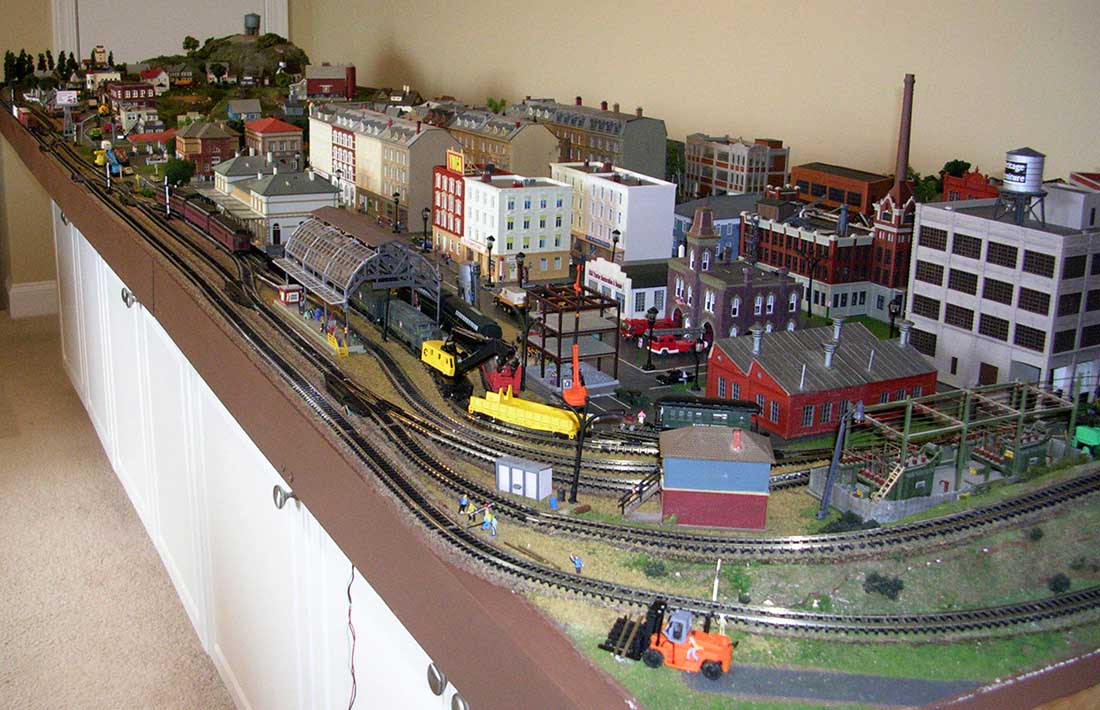
The O scale city model train layout features a double-loop track that weaves through a dense urban landscape with industrial outskirts. Elevated tracks and bridges add depth, while detailed buildings, streets, and varied vehicles create a realistic city scene. Rural elements on the outskirts contrast with the urban center. This layout is a great choice if you’re looking to replicate city life and complexity in their scenery.
Tower Model Railroad Scenery

The image displays a Tower model train layout with a dual-track system skirting a central lighthouse on a rocky outcrop. This feature, along with a realistic waterway and aged buildings, creates a maritime industrial scene. The tracks bridge two areas, adding operational interest. The detailed port setting with boats and urban structures makes it an engaging choice if you’re looking visually rich environment to your model railroad scenery.